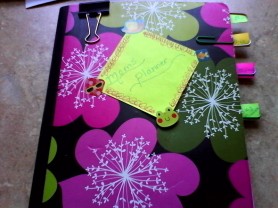
 Okay, so its not this WOW kind of project but I choose to start with this because I think every mom needs a planner. If you are like me you hate the kind of planners you buy at the store and most of them can be really expensive. So I made my own awesome planner from a one dollar composition book. If you have seen pictures of art journals, its kind of the same concept. I like the interactive part of my planner. I listed the materials I used below for mine, but make this fun, don’t just copy what I did. Some of you might say “man that looks like a lot of time”, well it can be, but that’s whats so therapeutic about it. I work on it every night after the kids are in bed and all the chores are done as a way to wind down for the day. All the worry and fuss with the bills stays in the mommy book (as my kids call it), and writing down a to-do list for tomorrow is a great way to get all those nagging ” I need to get this done” thoughts out of my head.
What I used:
- paperclips
- post it notes
- composition book (of course)
- multicolored pens
- the thick black page clips (I don’t know what they are really called)
- and lots of stickers
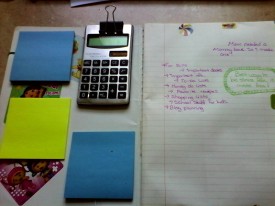
 On the inside cover I attached some post it notes by basically removing the last sticky note from the bottom and sticking it to the cover, and attached the calculator with the black clip. I use the calculator for managing the family bills. On the very first page, I wrote down the things that I only want in this notebook. This serves as a reminder that only your worries (bills, kids, grocery lists, to-do lists, dinner menu, doctors appointments, etc) go into this mommy book. I have a separate book for journal writing if I need to rid my head of extra thoughts. Again, only update the mommy book at night before you go to bed so that you go to sleep with a clear mind. It works great for me so I recommend that you try it too.
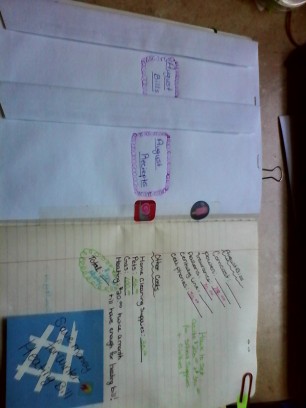
 I use the paper clips to serve as a type of divider like you would place in a binder. The section in the picture is for the bills, each page is for a different month. On the backside of one page I stapled two envelopes, one for bills, and one for receipts. I learned a long time ago to keep my paper bills and receipts so that I didn’t have to pay twice when the utility company makes a mistake.
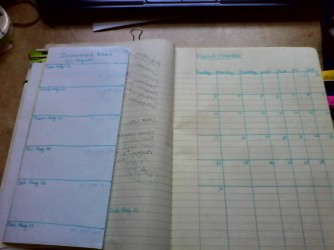
 The next section is my calendar. I love making my own calendars as opposed to buying one because it took me all of 3 minutes to make this and the average calendar is like 5$ depending on where you go. That 5$ can go into my craft fund so I’m not wasting it on a book of paper and pictures with dates that I can easily make myself. Not saying I’m broke, I’m just happy to spend my money on other things!
There are two other sections to this mommy book which is the doctors section for a list of my kids medications, questions for the next visit and shot records, and the last section is my kids school information. Things like PTA topics, teacher notes that should be kept, sweet drawings they did at school and so on. I do a new book every 6 months because they fill up fast. The old book gets placed in a shoe box in the safe with the other books and are kept till tax season. Once I file taxes I move them to the fire box in the attic for safe keeping for the next 7 years. After that the information is useless, but I like knowing that I am prepared if financial need for the paperwork were to arise.